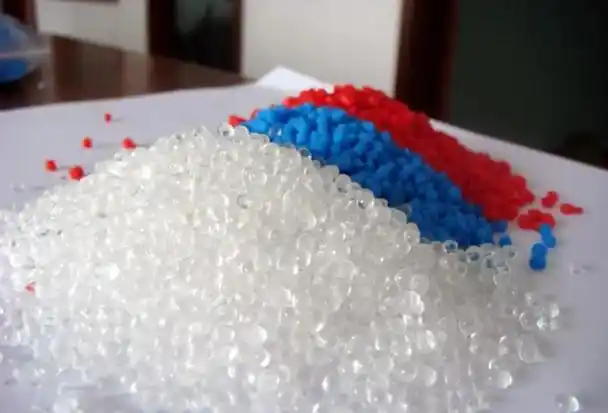
Having spent over a decade in the plastics manufacturing industry, I’ve tackled my fair share of challenges with thermoplastic elastomers (TPEs) in injection molding, particularly in overmolding applications like tool handles, medical grips, and consumer electronics components. TPEs are fantastic for their soft, rubber-like properties, but they can be finicky when it comes to achieving flawless results. One issue that’s come up time and again in my projects—and a common question I hear from fellow engineers—is: What do you do when TPE overmolding develops cracks at the gate area? These cracks can compromise the part’s strength, appearance, and functionality, especially in high-stakes applications like electrical plugs or sealed components. Drawing from my hands-on experience troubleshooting this exact problem, I’ll explain why these cracks occur, how to fix them, and how to prevent them in future runs, all while sharing practical tips to keep your production line humming.

Understanding Cracks at the Gate Area in TPE Overmolding
Overmolding involves injecting a soft TPE layer over a rigid substrate, like polypropylene (PP) or ABS, to create a part with both strength and flexibility. The gate area—where molten TPE enters the mold—often experiences high shear stress and rapid cooling, making it a hotspot for defects like cracks. These cracks can appear as hairline fractures, splits, or even delamination between the TPE and substrate, and they’re a nightmare for quality control. I’ve seen production batches scrapped because cracks at the gate weakened TPE grips, causing them to fail during testing. The good news? This issue is fixable with the right approach, focusing on material compatibility, mold design, processing parameters, and substrate preparation. Let’s dive into the causes and solutions.
Causes of Cracks at the Gate Area and How to Fix Them
Cracks at the gate area in TPE overmolding typically stem from high shear stress, poor material bonding, improper mold design, or suboptimal processing conditions. Below, I’ll break down each cause and share fixes that have worked for me in real-world projects.
1. High Shear Stress at the Gate
The gate is where molten TPE flows into the mold at high speed and pressure, creating shear stress that can degrade the material or cause micro-tears. Soft TPEs, like SEBS-based grades (20-60 Shore A), are especially sensitive to shear, which can lead to cracks as the material cools. I once dealt with a TPE handle project where cracks appeared at the pin gate due to excessive shear.
Fixes:
Use Larger Gates: Small gates, like pin gates, increase shear. I switch to edge gates or fan gates (0.5-2 mm wide) to reduce flow resistance and shear stress.
Lower Injection Speed: A fast injection speed amplifies shear. I use a multi-stage injection profile—fast to fill the mold, then slower (e.g., 20-50 mm/s) to pack out the gate area.
Optimize Gate Location: Place gates away from high-stress areas or thin walls. For a TPE plug, relocating the gate to a thicker section eliminated cracks.
Add Flow Aids: Incorporate silicone-based lubricants or low-molecular-weight waxes (0.5-1% by weight) to reduce viscosity and shear. I’ve used silicone additives to improve flow without affecting bonding.
My Tip: Test gate size and injection speed during trial runs to find the sweet spot for your TPE grade.

2. Poor Material Bonding
Cracks often occur if the TPE doesn’t bond well with the substrate, causing stress at the gate where flow transitions. Incompatible materials or contaminated substrates weaken adhesion, leading to delamination or cracks. I learned this the hard way when a TPE overmolded onto ABS cracked because the substrate wasn’t properly cleaned.
Fixes:
Choose Compatible Materials: Ensure the TPE is formulated for the substrate. For PP, I use SEBS-based TPEs; for ABS, TPUs or SBCs work well. Check the supplier’s compatibility chart.
Preheat the Substrate: Heating the substrate to 50-80°C before overmolding improves bonding by reducing thermal shock. I’ve used infrared heaters to preheat PP inserts for TPE grips.
Clean the Substrate: Remove oils, dust, or mold release agents with isopropyl alcohol or a plasma treatment. For a medical device project, plasma cleaning boosted adhesion and eliminated cracks.
Use Adhesion Promoters: Apply a primer or adhesive promoter compatible with TPE and the substrate. I’ve used Loctite primers for tricky ABS-TPE combinations.
My Tip: Run adhesion tests (e.g., peel or shear tests) on sample parts to confirm bonding strength before full production.
3. Improper Mold Design
Mold design flaws, like sharp corners or insufficient venting, can trap stress or air at the gate, causing cracks. TPE’s elasticity makes it prone to sticking, which amplifies stress during ejection. I once fixed a TPE seal mold where cracks formed at the gate due to poor venting.
Fixes:
Smooth Gate Transitions: Ensure gates have radiused edges (0.1-0.5 mm) to reduce stress concentration. I redesigned a gate with a 0.3 mm radius to eliminate cracks.
Improve Venting: Add 0.01-0.03 mm vents near the gate to release trapped air, which can cause localized stress. I’ve seen venting improvements cut crack rates by 80%.
Increase Draft Angles: Use 1-3° draft angles to ease part release and reduce stress at the gate. For a TPE plug, increasing draft to 2° helped.
Polish Mold Surfaces: A mirror-polished mold (SPI A1 or A2) reduces sticking, which can pull and crack the TPE at the gate. I’ve also used PTFE coatings for stubborn molds.
My Tip: Work with your mold maker to incorporate smooth transitions and adequate venting from the design phase.

4. Suboptimal Processing Conditions
Incorrect temperatures, pressures, or cooling times can create stress or weak bonding at the gate, leading to cracks. TPEs are sensitive to thermal and mechanical stress, and I’ve seen high melt temperatures cause cracks by degrading the material.
Fixes:
Lower Melt Temperature: Set melt temperature at 160-200°C for SEBS-based TPEs or 180-210°C for TPUs. I reduced melt temperature from 220°C to 190°C in a TPE grip project to stop cracks.
Adjust Mold Temperature: A mold temperature of 20-40°C ensures proper cooling without excessive stress. I’ve used 30°C for most TPE overmolding to balance flow and release.
Extend Cooling Time: Allow 15-30 seconds for cooling to solidify the TPE, reducing stress at the gate. I extended cooling by 5 seconds for a TPE plug to eliminate cracks.
Reduce Injection Pressure: Use 50-80 MPa to avoid overpacking, which can stress the gate area. I adjust holding pressure to 50-70% of injection pressure for 2-5 seconds.
My Tip: Run trials to optimize parameters, starting with the TPE manufacturer’s recommendations.
| Cause | Why It Causes Cracks | Fix | Key Action |
|---|---|---|---|
| High Shear Stress | Degrades TPE at gate | Use larger gates, lower speed | Edge/fan gates, 20-50 mm/s speed |
| Poor Bonding | Weak TPE-substrate adhesion | Compatible materials, clean substrate | Preheat to 50-80°C, use primer |
| Mold Design | Stress from sharp gates, poor venting | Smooth transitions, add vents | 0.01-0.03 mm vents, 1-3° draft |
| Processing Conditions | Thermal/mechanical stress | Lower temps, extend cooling | Melt 160-200°C, cool 15-30 seconds |
Step-by-Step Guide to Fix Cracks at the Gate Area
If you’re already seeing cracks at the gate area, here’s my proven approach to resolve the issue:
1. Pause Production and Inspect
Stop the machine to avoid further damage. Examine:
Crack Location and Type: Are cracks hairline, splits, or delamination? This helps identify the cause.
Gate Area: Check for sharp edges, residue, or poor venting.
Parts and Substrate: Look for signs of weak bonding or substrate contamination.

2. Adjust Processing Parameters
Lower Melt Temperature: Reduce by 5-10°C (e.g., from 210°C to 200°C) to prevent degradation.
Set Mold Temperature: Adjust to 20-30°C for faster solidification.
Slow Injection Speed: Use a multi-stage profile, slowing to 20-50 mm/s during packing.
Extend Cooling Time: Add 5-10 seconds to ensure the TPE sets properly.
Reduce Pressure: Lower injection pressure by 10 MPa and holding pressure to 50-70%.
3. Improve Material and Substrate Prep
Verify TPE Compatibility: Confirm the TPE is suited for the substrate. Switch to a compatible grade if needed.
Dry TPE: Ensure moisture content is below 0.02% by drying at 80-100°C for 2-4 hours.
Clean Substrate: Wipe with isopropyl alcohol or use plasma treatment to remove contaminants.
Preheat Substrate: Heat to 50-80°C to enhance bonding.
4. Modify the Mold
Enlarge or Redesign Gate: Switch to a fan gate or edge gate (0.5-2 mm) with radiused edges.
Add Vents: Install 0.01-0.03 mm vents near the gate to release air.
Polish Mold: Ensure an A1 or A2 finish or apply a PTFE coating.
Check Draft Angles: Increase to 2-3° if below 1°.
5. Apply Release Agents
Use a silicone-free mold release agent (e.g., Stoner A320) to reduce sticking, which can stress the gate area.
Apply every 50-100 cycles, wiping off excess to avoid contamination.

6. Test and Monitor
Run a trial batch with adjusted settings and inspect parts for cracks.
Use a magnifying glass or microscope to check gate areas for micro-cracks.
Log successful parameters (e.g., temperature, pressure, cooling time) for future runs.
Preventing Cracks in Future TPE Overmolding
To avoid gate-area cracks long-term, here’s what I do before starting a new project:
Select Compatible Materials: Choose TPE grades designed for the substrate, like SEBS for PP or TPU for ABS. I always test adhesion with sample parts.
Optimize Mold Design: Incorporate fan gates, 0.01-0.03 mm vents, 2-3° draft angles, and polished surfaces from the start.
Fine-Tune Equipment: Use a low-shear screw (compression ratio 2:1-2.5:1) and calibrate the machine for precise temperature and pressure control.
Prepare Substrates Properly: Clean and preheat substrates consistently to ensure strong bonding.
Establish Quality Checks: Inspect gate areas regularly during production and maintain a maintenance log for molds and machines.

Common Defects Related to Gate Cracks
Cracks at the gate can lead to other issues. Here’s what I’ve seen and how to address them:
Delamination: Weak TPE-substrate bonding causes peeling. Preheat substrates and use primers or compatible TPEs.
Flow Lines: Uneven flow at the gate creates surface marks. Use fan gates and raise mold temperature to 30-40°C.
Sink Marks: Insufficient packing at the gate causes depressions. Increase holding pressure to 60-80% for 2-5 seconds.
Flash: Overpressurizing at the gate pushes TPE into mold seams. Lower injection pressure by 10 MPa.
My Experience: Overcoming Gate Cracks
One of my toughest challenges was overmolding TPE onto PP for a tool handle. The gate area showed hairline cracks due to a small pin gate and high injection speed. We switched to a fan gate, lowered the injection speed to 30 mm/s, and preheated the PP substrate to 60°C. The cracks disappeared, and the handles passed rigorous durability tests. Another project involved TPE seals for electrical plugs, where cracks formed because of poor venting and contaminated substrates. Adding micro-vents and cleaning the substrates with plasma treatment solved the issue, and production hit full speed.
Fixing cracks at the gate area in TPE overmolding requires a mix of material tweaks, mold adjustments, and processing finesse. With the steps above, you can eliminate this defect and produce flawless parts. If you’re grappling with cracks or setting up a new TPE overmolding project, share your situation in the comments—I’m eager to offer tailored advice from my years in the field!

Frequently Asked Questions
Q1: Why do cracks only appear at the gate area in TPE overmolding?
A: The gate area experiences high shear stress, rapid cooling, and flow transitions, which can degrade TPE or stress the material-substrate bond. Use larger gates and lower injection speeds to reduce stress.
Q2: Can I fix gate cracks without modifying the mold?
A: Yes, try lowering melt temperature (5-10°C), slowing injection speed (20-50 mm/s), and preheating the substrate (50-80°C). If cracks persist, mold changes like larger gates or venting may be needed.
Q3: How do I know if my TPE is compatible with the substrate?
A: Check the supplier’s compatibility chart and run adhesion tests (e.g., peel or shear tests). Poor bonding causes cracks or delamination, so test samples before production.
Q4: Will a release agent help prevent gate cracks?
A: Release agents reduce sticking, which can contribute to gate stress, but they don’t directly fix cracks. Use silicone-free agents and focus on optimizing gates, venting, and parameters.


