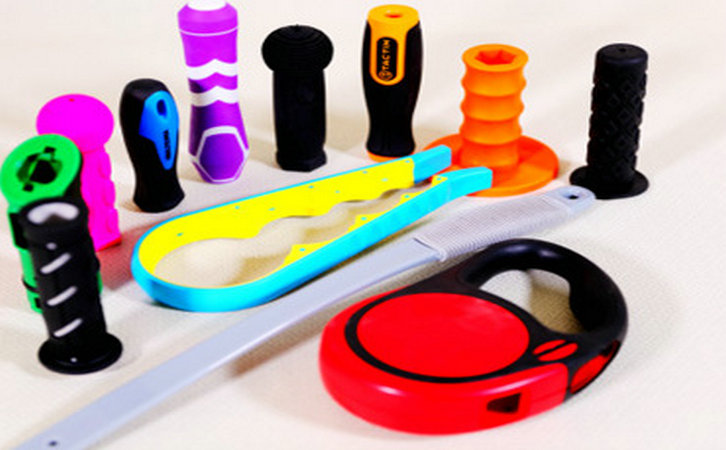
Having spent over a decade in the rubber and plastics industry, I’ve seen my fair share of challenges when it comes to TPR (Thermoplastic Rubber) products. One question that pops up time and again is how to get vibrant, durable, and consistent colors on TPR soft gel products. Whether you’re making colorful shoe soles, playful toys, or sleek medical grips, achieving the perfect color is both an art and a science. In this article, I’ll walk you through the ins and outs of coloring TPR products, sharing practical tips, industry insights, and lessons from my own experience to help you nail that flawless finish.
Understanding the Coloring Challenge for TPR
TPR is a unique material, blending the elasticity of rubber with the processability of plastics. Its soft, flexible nature makes it a favorite for products that need both comfort and durability. But when it comes to coloring, TPR can be a bit finicky. The material’s semi-transparent or opaque base, combined with its sensitivity to processing conditions, means that getting consistent, high-quality colors isn’t as simple as tossing in some dye.
From my years of troubleshooting, I’ve found that the main hurdles include:
Color Inconsistency: Variations in color across batches or even within a single part.
Fading or Bleeding: Colors that lose vibrancy over time or migrate to other surfaces.
Processing Limitations: High temperatures or improper mixing can degrade pigments or cause uneven dispersion.
Material Compatibility: Not all colorants work well with TPR’s chemical makeup, leading to poor adhesion or performance issues.
To tackle these, we need to approach coloring from multiple angles: choosing the right colorants, optimizing processing techniques, ensuring compatibility, and testing for durability. Let’s dive into each of these areas with practical, hands-on advice.

Step-by-Step Guide to Coloring TPR Soft Gel Products
1. Choose the Right Colorants for TPR
The first step to vibrant TPR colors is selecting the right colorant. Not all pigments or dyes are created equal, and TPR’s unique properties demand specific choices. Early in my career, I worked with a toy manufacturer who struggled with dull colors on their TPR figures. The issue? They were using generic pigments that weren’t optimized for TPR’s SEBS or SBS base.
Types of Colorants for TPR:
Masterbatches: These are concentrated pellets of pigment or dye dispersed in a carrier resin. They’re the go-to for TPR because they ensure even color distribution and are easy to blend during processing. According to Plastics Technology, masterbatches can achieve up to 95% color consistency when properly formulated.
Pre-Compounded Colored TPR: Some suppliers offer TPR already mixed with colorants. This is convenient for small-scale production but limits customization.
Liquid Colorants: These are less common for TPR due to challenges in achieving uniform dispersion, but they can work for specific applications with precise metering equipment.
Dry Pigments: Rarely used for TPR because they’re hard to disperse evenly and can clump, leading to streaks or spots.
Tips for Selecting Colorants:
Match the Base Resin: Ensure the masterbatch carrier (e.g., PE or PP) is compatible with your TPR’s base (SBS or SEBS). For SEBS-based TPR, use a masterbatch with a similar polarity to avoid phase separation.
Opt for High Heat Stability: TPR processing temperatures typically range from 180-220°C. Choose pigments that can withstand these temperatures without degrading, such as phthalocyanine blues or quinacridone reds.
Check for Regulatory Compliance: If your product is for food contact, medical, or children’s toys, use colorants that meet standards like FDA 21 CFR or EN 71-3.
Test Dispersion: Before full production, run a small batch to check for color streaks or unevenness. A well-dispersed masterbatch should yield uniform color within ±2% Delta E (color difference) per ASTM D2244.
Here’s a quick comparison of colorant types for TPR:
|
Colorant Type |
Advantages |
Disadvantages |
Best For |
|---|---|---|---|
|
Masterbatches |
High consistency, easy to use |
Higher cost, limited customization |
Mass production, vibrant colors |
|
Pre-Compounded TPR |
No mixing required, consistent results |
Less flexible, higher material cost |
Small batches, standard colors |
|
Liquid Colorants |
Precise dosing, vibrant for small runs |
Hard to disperse, equipment-dependent |
Specialty applications |
|
Dry Pigments |
Low cost, wide color range |
Poor dispersion, risk of streaks |
Rarely used for TPR |
2. Optimize the Mixing and Processing Process
Once you’ve got the right colorant, the next step is ensuring it’s properly incorporated into the TPR. I recall a project where a client’s TPR grips had patchy colors because their mixing process wasn’t thorough. After adjusting the screw speed and back pressure on their injection molding machine, the issue was resolved.
Key Processing Tips:
Use a High-Shear Mixer: For masterbatches, blend the colorant with TPR pellets in a high-shear mixer before feeding them into the extruder or injection molding machine. Aim for a mixing time of 3-5 minutes to ensure even distribution.
Control Processing Temperatures: Keep barrel temperatures between 180-220°C to avoid degrading the colorant. For SEBS-based TPR, stay on the lower end (180-200°C) to preserve pigment stability.
Adjust Screw Speed and Back Pressure: Higher screw speeds (e.g., 100-150 RPM) and moderate back pressure (e.g., 5-10 MPa) improve color dispersion by increasing shear.
Maintain Consistent Dosing: For masterbatches, use a gravimetric feeder to ensure a consistent colorant-to-TPR ratio, typically 1-5% by weight, depending on the desired opacity.
Equipment Considerations:
Use a single-screw extruder with a mixing zone or a twin-screw extruder for better color dispersion.
Clean the barrel and screw thoroughly between color changes to prevent contamination, which can cause streaks or off-colors.

3. Ensure Color Durability and Stability
A vibrant color is only half the battle—keeping it that way is just as important. I once worked with a shoe manufacturer whose TPR soles faded after a few months of outdoor use. The culprit was a pigment that wasn’t UV-resistant. Since then, I always emphasize testing for durability.
Strategies for Long-Lasting Colors:
Choose UV-Stable Pigments: For outdoor products, select pigments like titanium dioxide (for whites) or carbon black (for dark colors) that resist UV degradation. Check the pigment’s Lightfastness Rating (per ISO 105-B02), aiming for a rating of 6 or higher on the Blue Wool Scale.
Add Stabilizers: Incorporate UV absorbers or hindered amine light stabilizers (HALS) into the TPR formulation to enhance color retention. A dosage of 0.2-0.5% by weight is typically effective.
Prevent Color Migration: Some pigments, especially low-molecular-weight dyes, can migrate to the surface or other materials. Use high-molecular-weight pigments or masterbatches with good binding to the TPR matrix.
Test for Environmental Exposure: Conduct accelerated weathering tests (e.g., ASTM G154) to simulate UV, heat, and humidity exposure. Aim for minimal color change ( Delta E < 3 ) after 500 hours of testing.
4. Explore Alternative Coloring Techniques
While masterbatches and compounding are the most common methods, other techniques can add unique effects or solve specific challenges. For instance, I helped a client create a translucent TPR toy with a gradient color effect using a specialized co-extrusion process.
Alternative Methods:
Surface Coating: Apply a colored coating or paint post-molding for complex designs or small batches. Use polyurethane-based coatings for flexibility and adhesion to TPR. Note that coatings may wear off over time, so test for abrasion resistance per ASTM D4060.
In-Mold Coloring: Inject different colored TPR materials into the mold simultaneously to create multi-color or patterned parts. This requires precise mold design and multi-shot injection equipment.
Laser Marking: For subtle color effects or logos, use laser marking to alter the TPR surface. This is ideal for high-precision applications but limited to monochromatic designs.
Co-Extrusion: Layer colored and uncolored TPR during extrusion to create gradient or striped effects. This is common in tubing or cable applications.
Here’s a comparison of alternative coloring techniques:
|
Technique |
Advantages |
Disadvantages |
Best For |
|---|---|---|---|
|
Surface Coating |
Flexible designs, small batches |
Risk of peeling, higher labor cost |
Prototypes, decorative parts |
|
In-Mold Coloring |
Multi-color parts, seamless finish |
Complex molds, expensive equipment |
High-end products, complex designs |
|
Laser Marking |
Precise, durable markings |
Limited to simple colors/patterns |
Logos, serial numbers |
|
Co-Extrusion |
Unique gradient/striped effects |
Requires specialized equipment |
Tubing, cables, aesthetic parts |
5. Test and Validate the Results
No matter how well you plan, testing is critical to ensure color quality. I learned this the hard way early in my career when a batch of TPR grips passed visual inspection but failed in the field due to color bleeding. Now, I always advocate for rigorous testing.
Testing Protocols:
Color Consistency: Use a spectrophotometer to measure color across multiple parts, ensuring Delta E < 2 per ASTM D2244.
Adhesion and Migration: Perform a rub test (e.g., AATCC 8) to check for color transfer. No visible transfer after 100 cycles is ideal.
Environmental Durability: Test for UV, heat, and humidity resistance using standards like ASTM G154.
Mechanical Performance: Ensure coloring doesn’t compromise TPR’s elasticity or strength. Test tensile strength and elongation per ASTM D412.

Case Study: Bringing Vibrant Colors to TPR Shoe Soles
To illustrate these principles, let me share a real-world example. A few years ago, I worked with a footwear company struggling to achieve consistent red colors on their TPR shoe soles. The soles looked great initially but faded after a few weeks of outdoor use.
My Approach:
Colorant Selection: The original masterbatch used a low-cost red pigment with poor UV stability. I recommended switching to a quinacridone red masterbatch with a Lightfastness Rating of 7 and a PE carrier compatible with their SEBS-based TPR.
Process Optimization: We adjusted the injection molding machine to a barrel temperature of 190°C, increased screw speed to 120 RPM, and set a 4% masterbatch dosing ratio using a gravimetric feeder.
Stabilizers: Added 0.3% HALS to the formulation to boost UV resistance.
Testing: Conducted 500-hour weathering tests per ASTM G154, confirming a Delta E of 1.8 (minimal fading). Rub tests showed no color transfer after 150 cycles.
The result was a vibrant, durable red sole that held up under sunlight and wear, earning the client glowing customer feedback. This project reinforced the importance of combining the right materials, processes, and testing.
Long-Term Strategies for Consistent Coloring
To keep your TPR products looking great batch after batch, consider these proactive strategies:
Partner with Reliable Suppliers: Work closely with masterbatch and TPR suppliers to ensure consistent quality. Request Certificates of Analysis (CoA) for each batch.
Standardize Processes: Document colorant ratios, processing parameters, and testing protocols to ensure repeatability. Train operators regularly.
Invest in Quality Control: Use spectrophotometers and weathering chambers to monitor color quality over time.
Stay Updated on Regulations: Keep abreast of standards like EN 71-3 for toys or FDA 21 CFR for food-contact items to ensure compliance.

FAQs: Answering Your Burning Questions
To wrap up, here are some common questions I’ve encountered about coloring TPR products, along with my answers:
Q1: Can I use the same masterbatch for SBS and SEBS-based TPR?
A: Not always. SBS and SEBS have different polarities, so the masterbatch carrier must match the TPR base. For SBS, a PP carrier often works; for SEBS, a PE or SEBS carrier is better. Test compatibility to avoid phase separation.
Q2: Why do my TPR parts have color streaks?
A: Streaks are usually caused by poor dispersion or contamination. Check your mixing process, increase screw speed, or clean the barrel thoroughly. Ensure the masterbatch is evenly blended before processing.
Q3: How can I achieve translucent colors in TPR?
A: Use a translucent TPR base and a low-concentration masterbatch (e.g., 1-2%). Avoid high-opacity pigments like titanium dioxide. Co-extrusion or in-mold coloring can also create gradient translucent effects.
Q4: Will coloring affect TPR’s flexibility or strength?
A: High-quality masterbatches at recommended dosages ( 1-5% ) typically don’t impact mechanical properties. However, excessive colorant or incompatible pigments can reduce elasticity. Test tensile strength per ASTM D412 to confirm.
Wrapping It Up
Coloring TPR soft gel products is a blend of science, precision, and a touch of creativity. By choosing the right colorants, fine-tuning your processes, ensuring durability, and testing rigorously, you can achieve stunning, long-lasting results. My years in the industry have taught me that every challenge is an opportunity to learn and improve. Whether you’re crafting vibrant toys or durable shoe soles, I hope these insights help you bring your vision to life with confidence.
Got more questions about TPR coloring? I’m all ears—let’s dive deeper and solve those challenges together!


